Your platformer needs a hero, a sidekick, a dozen enemies, some NPCs, and a boss that makes players sweat. Hand-drawing every side-view sprite takes forever, and you’re one person trying to ship. Good news: AI sprite generators actually work now, not the janky junk from two years ago, but real sprite sheets you can drop into Unity or Godot today.
I tested every platformer sprite tool I could find. Paid, free, and a few buried in Reddit threads. Below is what produces game-ready output instead of slop you throw away, plus the exact settings and workflow that get you there.
Quick Picks
- Best for complete animation sets: GodMode AI or Ludo.ai. Full walk/run/jump/attack/death from one prompt.
- Best pixel-perfect output: Retro Diffusion or PixelLab. True pixel grid, integrates with hand-drawn art.
- Best free: goEnhance, Perchance, or Leonardo AI’s free tier for concepts.
- Buy Aseprite no matter what. Post-processing is part of the job, not a failure.
Jump to: Why Platformers Are Different, the Tools, Free Options, the Unity/Godot Workflow, Which Tool for Which Project, Common Mistakes, and the Bottom Line.
Why Platformers Are Different
Three things make platformer sprites harder than other game art.
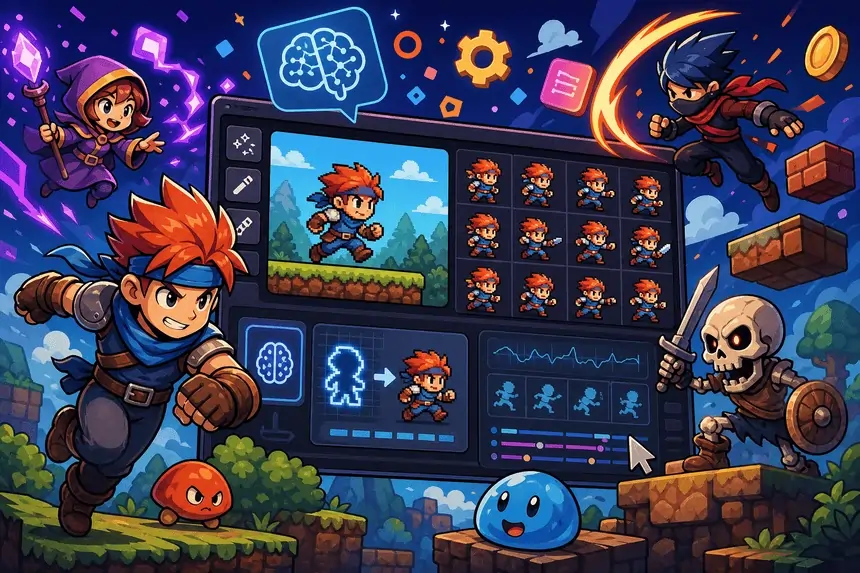
Side-view consistency. Your character must read identically standing, running, jumping, attacking. Players track that silhouette constantly. One off frame breaks the illusion.
Animation cycles are mandatory. A visual novel survives on a few static poses. A platformer needs walk, run, jump, attack, and death cycles. A single character can hit 50+ frames before you’ve touched the enemies.
Style has to stay unified. Mix a hand-drawn hero with AI enemies that look slightly off and your game reads as an asset flip. Players notice. Reviewers definitely notice.
That’s why general image generators fail here. You need tools that understand sprite sheets, frames, and side-view anatomy.
The Tools
PixelLab: the pixel platformer pick
Built for game assets, and it shows. The skeleton-based animation understands how a platformer character moves, so you get anatomically consistent walk and jump cycles where proportions stay locked, not random frames that vaguely match. Feed it a reference sprite and the style-consistency feature generates matching enemies and poses. Tileset generation keeps your backgrounds unified with your characters. Subscription with a free trial.
GodMode AI: full sheets in minutes
Godmode.ai markets itself as a sprite-sheet generator for Unity 2D and Godot, and delivers exactly that: transparent backgrounds, proper frame alignment, production-ready. The standout is breadth, 16+ animation types (run, jump, attack, slash, death), so you can generate a complete character with every standard action from one prompt. Its pixel mode makes authentic retro output, not “pixel-style but not actually pixelated.” Pay-as-you-go from $12 for 20 sprites, no subscription.
Ludo.ai: the animation trick
Different approach: it generates a video of your character doing an action, then extracts frames. The result is smoother, more natural cycles than frame-by-frame, which kills the uncanny jitter that gives AI sprites away. Prompt “walking and attacking animations” and get full sheets per action. Exports PNG sheets for Unity and Godot. Free tier with 30 credits, paid from $15/month for 250.
Retro Diffusion: true pixel perfection
Two years of development aimed at one problem: fake pixel art. Where others look pixelated from a distance but have irregular pixels and soft edges up close, this outputs a genuine uniform grid. For authentic 8-bit or 16-bit work, that means zero cleanup to fix scaling, and seamless mixing with hand-drawn sprites. The Aseprite plugin generates inside your existing workflow. Website credits (~$0.01/image) or the Aseprite extension at $65 one-time.
Free Options Worth Your Time
goEnhance.ai takes text or image input, does side-view sprite sheets with adjustable frame counts, and explicitly supports Unity, Godot, and Unreal export formats. Strong for rapid enemy iteration: generate ten, keep three. Free with limits.
Leonardo AI has a dedicated pixel art model and a free 150 daily tokens. The Canvas editor lets you inpaint and refine, swap a weapon, recolor, adjust a pose, while keeping consistency. ControlNet (Depth, Pose, Edge) helps lock specific platformer stances.
Perchance is free, unlimited, no signup. Lower quality, but when you need 50 enemy concepts to find 3 keepers, free and unlimited beats polish.
Bylo.ai does clean static sprites and basic walk cycles with themed styles (fantasy, sci-fi, chibi). Free, browser-based. Pokecut arranges multi-frame sheets from a simple prompt; needs cleanup but a solid starting point.
The Unity and Godot Workflow
The tool matters less than knowing how to use it. This is what works.
1. Define requirements first. A typical protagonist needs idle (4-8 frames), walk (6-12), run (6-8), jump (3-6 with takeoff/apex/landing), attack (4-8), hit reaction (2-4), death (4-8). Multiply by every enemy, NPC, and boss. AI doesn’t cut the planning, it speeds the execution.
2. Establish a visual reference. Generate one hero sprite that defines your style. Feed it to PixelLab or GodMode when generating everything else. This is what separates a real game from an asset pile.
3. Generate base sprites. Make 10-20 variations before committing. Always prompt “side-view” explicitly, since many tools default to three-quarter or front-facing. Add style keywords or game references (“Mega Man style,” “Castlevania aesthetic”), AI responds well to concrete references.
4. Generate animation sheets. Once designs are locked, request specific actions: “walking cycle, 8 frames,” “sword slash, 6 frames.” For tools that don’t do sheets, generate key poses (idle, mid-walk, jump apex, attack wind-up and follow-through) and interpolate in Aseprite.
5. Slice and import. In Unity’s Sprite Editor, set slice to “Grid by Cell Size” with your dimensions (32×32, 64×64, 128×128) and it auto-generates sprites. In Godot, import as Texture2D, add an AnimatedSprite2D, configure frames in SpriteFrames. Keep frames identically sized, feet on the same baseline, centered.
6. Post-process in Aseprite. Plan to edit, this is production reality, not tool failure. Align frames, clean artifacts, unify palettes, remove hallucinations (extra limbs, inconsistent details). Watch for “sliding feet” in walk cycles, where the character glides instead of steps; that needs manual fixing. Use indexed color mode to enforce a retro palette.
Which Tool for Which Project
Pixel art platformer: PixelLab or Retro Diffusion. Budget: Bylo for static, Perchance for concepts.
HD 2D platformer: Ludo.ai or GodMode AI for higher-res with smooth motion. Budget: Leonardo free tier with careful prompting.
Rapid prototyping: goEnhance or Perchance. Volume over polish.
Complete animation sets: GodMode AI or Ludo.ai, both do full action sets from one prompt.
Unity 2D specifically: GodMode AI. Explicit Unity compatibility and sheet formatting are its core use.
Godot: PixelLab or goEnhance. PixelLab’s tilesets also feed Godot’s TileMap.
Common Mistakes
Expecting perfect output. Nothing is game-ready without refinement. Budget the post-processing time. Treat these as accelerators, not replacements for judgment.
Ignoring style consistency. Generate characters with no reference and your cast looks like five different games. Always set a reference and use tools that accept it.
Wrong resolution. A 512×512 output crushed down to 32×32 rarely beats native small generation. Match settings to your target size, or use Retro Diffusion, which respects pixel constraints.
Forgetting animation. A gorgeous static character that moves badly helps nobody. Test walk cycles early, not as an afterthought.
Over-prompting. Simpler usually wins. “Pixel art knight, side view, fantasy style” beats a paragraph specifying ruby pommels and exact armor trim. Start simple, add detail only when the AI misreads you.
The Bottom Line
Start with GodMode AI or Ludo.ai for complete animation sets, both produce output that works with minimal cleanup. Reach for PixelLab or Retro Diffusion when pixel-perfect aesthetics matter and need to sit beside hand-drawn art. Lean on free tools (goEnhance, Bylo, Perchance, Leonardo) during the concept phase and save budget for final assets. Buy Aseprite regardless. And plan a hybrid: AI builds the foundation, you refine it, which is faster than either alone while keeping the quality players expect.
These tools actually work now. They work best in the hands of a dev who knows their limits. Your next hero is waiting to be generated. Go build something great.
For the rest of your pipeline, here’s my free AI tools for indie game developers guide, and how to use ChatGPT for indie game development.